Rendered at 02:15:22 08/12/25


Descarga digital
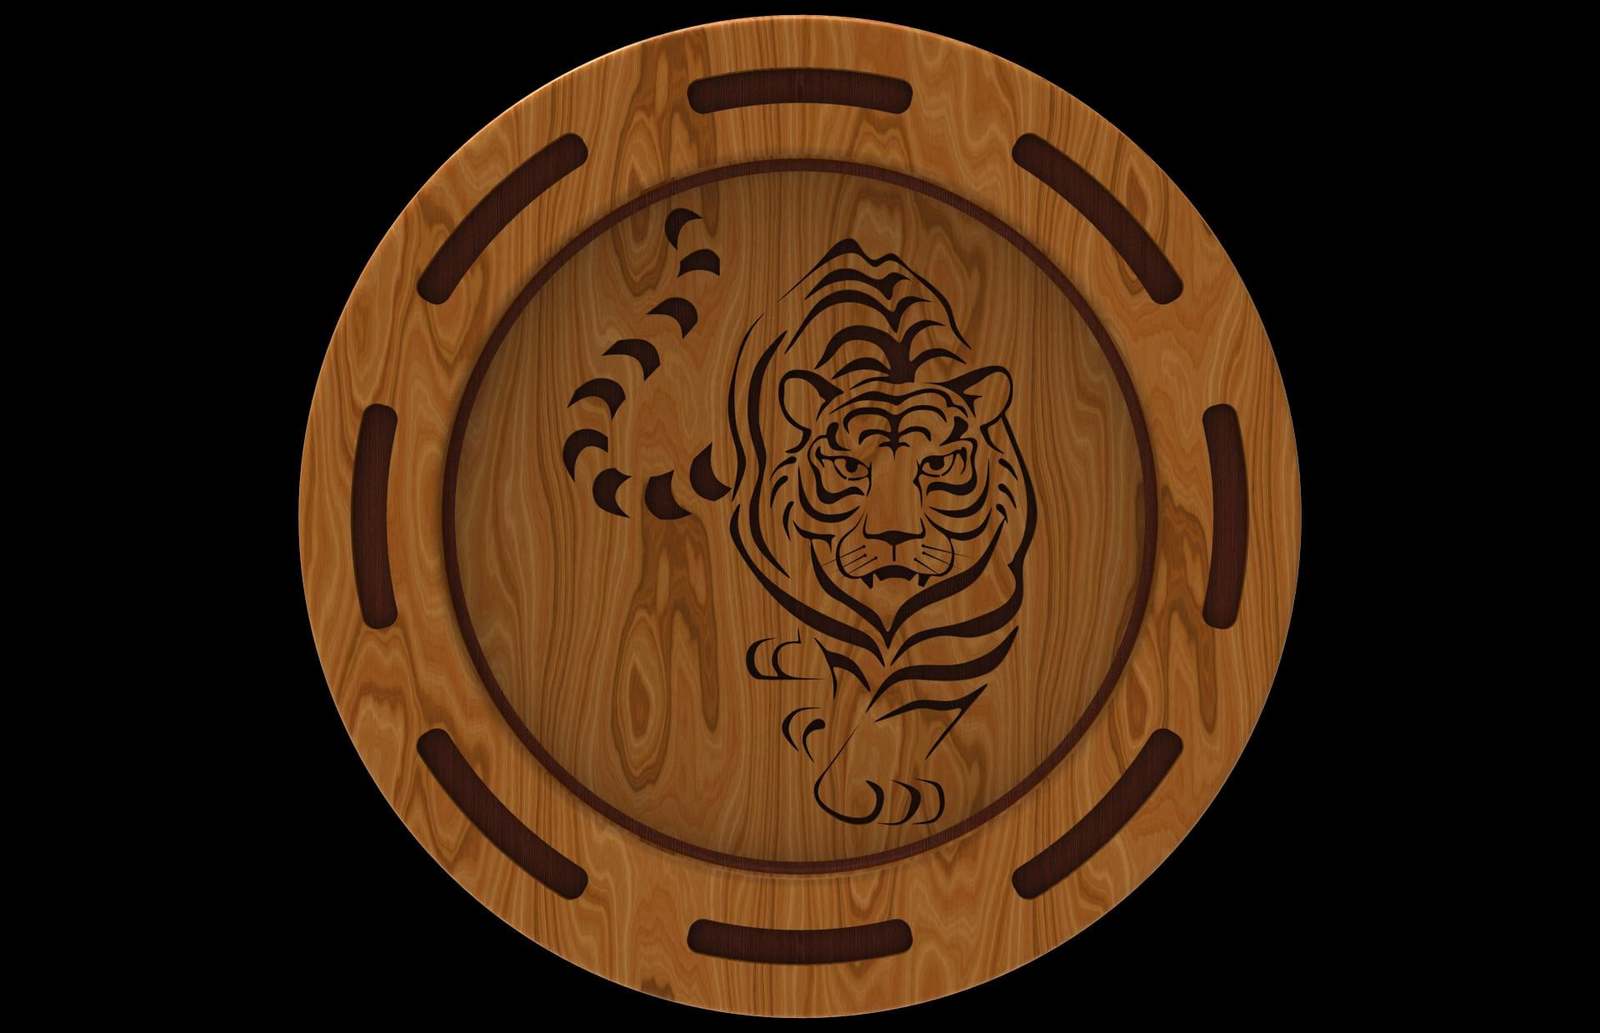
Digital files for laser cutting and 3D printing: SVG, STL, STEP - Tiger
$148.95 MXN
Handling Fee
GRATIS
Política de oferta
OBO - El vendedor acepta ofertas en este artículo.
Detalles
La política de devoluciones
None: All purchases final
Protección de compra
Opciones de pago
PayPal accepted
PayPal Credit accepted
Venmo accepted
PayPal, MasterCard, Visa, Discover, and American Express accepted
Maestro accepted
Amazon Pay accepted
Nuvei accepted
Detalles del anuncio
| Envío de descuento: |
El envío es gratuito para los productos digitales. |
|---|---|
| Publicado en venta: |
Más de una semana |
| Artículo número: |
1716333532 |
Descripción del Artículo
You are downloading the digital files for creating a unique four layered plate using laser cutting. However, the files are fully customizable and can be utilized for CNC machining and plasma cutting. The SVG files can be edited using Inkscape and/or other CAD software, the STL file can be used for 3D printing, and the STEP file contains all the necessary CAD data in a solid model format. Below are instructions for laser cutting and 3D printing. All our files are built using Bezier splines and are very high quality. Furthermore, the files are geometrically perfect (manifold) and editable with the proper software.
INSTRUCTIONS FOR LASER CUTTING AND FINISHING with the SVG files ((blue lines are for engraving, and the red lines are for cutting):
*** All wood is 1/8" thick. Cuts must be made with the material face down as there are some engraving lines on the back faces of some layers that are used for alignment and gluing purposes. ***
(1) Cut layer 1 and Layer 3 with a dark-colored plywood or hardwood like Walnut or Mahogany.
(2) Cut layer 2 and 4 with a light-colored plywood or hardwood like Maple or Baltic birch.
(3) Apply glue to the back of layer 3 inside the engraved line and align the outer edge of layer 4 to the engraved line on the back of layer 3; clamp and let cure for 4-6 hours.
(4) Apply glue to the back of layer 1 and align the outside edge of layer 2 with the outside edge of layer 1; clamp and let cure for 4-6 hours.
(5) Apply glue or epoxy to the back of layer 2 inside the engraved line and align the outer edge of layer 3 to the engraved line on the back of layer 2; clamp and let cure for 4-6 hours.
(6) Soften the sharp edges with some sandpaper either manually, using a flap wheel on a drill, detail sander, or while spinning the assembly on a lathe with a soft chuck attachment.
(7) Coat the assembly with Danish, Tung, or Teak Oil, or with Varnish, or Polyurethane as desired.
INSTRUCTIONS FOR 3D PRINTING with the STL file
(1) Load the STL file into the printing software used by your 3D printer (e.g. Cura).
(2) Scale as desired to fit the bed of your 3D printer.
(3) Generate a print file and forward it to the 3D printer.
Don't hesitate to contact us if you run into any problems.
Added to your wish list!
- Digital files for laser cutting and 3D printing: SVG, STL, STEP - Tiger
- 999 in stock
- Price negotiable
Get an item reminder
We'll email you a link to your item now and follow up with a single reminder (if you'd like one). That's it! No spam, no hassle.
Already have an account?
Log in and add this item to your wish list.