Rendered at 12:14:49 07/23/25


Protek Frame Slider Swing Arm Spool Kit Kawasaki 2009 2010 2011 EX650R Ninja 650
Los buques de
United States


Las opciones de envío
La política de devoluciones
Full refund available within 30 days
Protección de compra
Opciones de pago
PayPal accepted
PayPal Credit accepted
Venmo accepted
PayPal, MasterCard, Visa, Discover, and American Express accepted
Maestro accepted
Amazon Pay accepted
Nuvei accepted
Las opciones de envío
La política de devoluciones
Full refund available within 30 days
Protección de compra
Opciones de pago
PayPal accepted
PayPal Credit accepted
Venmo accepted
PayPal, MasterCard, Visa, Discover, and American Express accepted
Maestro accepted
Amazon Pay accepted
Nuvei accepted
Rasgos del artículo
| Categoría: | |
|---|---|
| cantidad disponible: |
Sólo uno en stock, para muy pronto |
| Condition: |
New |
| Brand: |
Pro-Tek |
| MPN: |
FSK-410K |
| UPC: |
Does not apply |
| Features: |
Durable, Easy Installation |
| Manufacturer Warranty: |
90 Day |
| Custom Bundle: |
No |
| Item Width: |
2 in |
| Vintage Part: |
No |
| OE/OEM Part Number: |
NA |
| Number of Pieces: |
4 |
| Modified Item: |
No |
| Performance Part: |
No |
| Item Length: |
4 in |
| Item Height: |
4 in |
| Machine Type: |
Street Motorcycle |
| Country/Region of Manufacture: |
United States |
| Material: |
ABS Plastic, ABS, Plastic |
| Universal Fitment: |
No |
| Attachment Type: |
Bolt-On |
| Non-Domestic Product: |
No |
| Model: |
2009-2011 Kawasaki EX650R Ninja 650R |
| Placement on Vehicle: |
Left, Right, Front, Rear |
| Item Weight: |
1 lb |
| Finish: |
Acetal Plastic |
| Color: |
Black |
| Mounting Holes: |
Self-Drill |
| Fit: |
Universal Sport Bike Fit |
| Type: |
Fairing/Body Work Kit |
| Items Included: |
Mounting Hardware, Bolts |
Detalles del anuncio
| Envío de descuento: |
Envío gratis para pedidos superiores a $100.00 |
|---|---|
| Publicado en venta: |
Más de una semana |
| Artículo número: |
1454008798 |
Descripción del Artículo
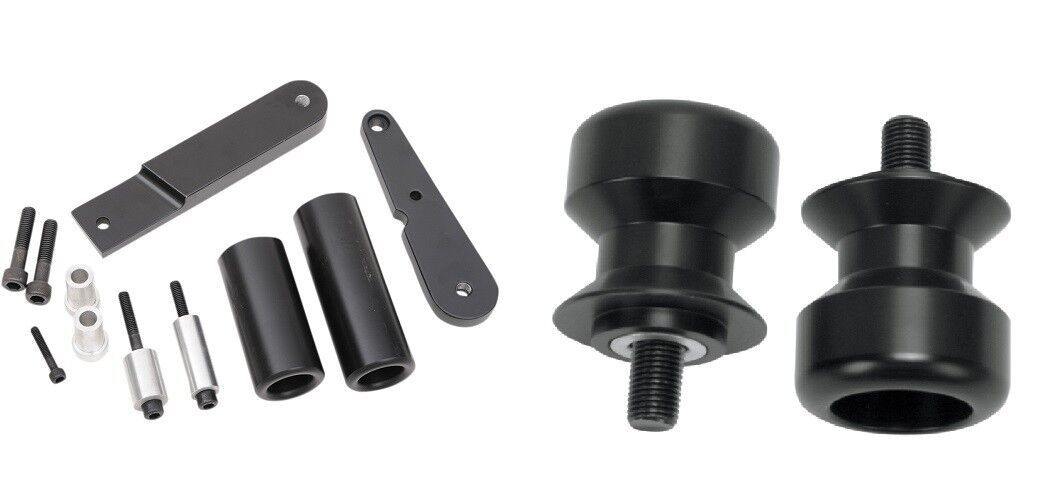
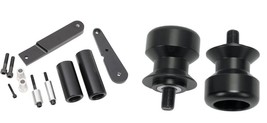
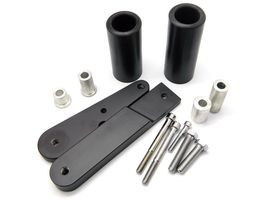
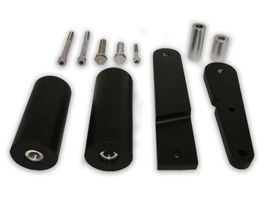
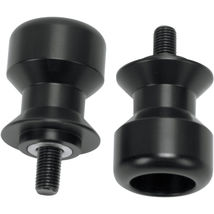
Pro-tek Frame Protector Slider Swing Arm Spool Slider Kit Kawasaki 2009 2010 2011 EX650R Ninja 650R Black
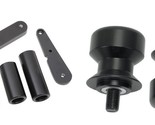
*Comes Complete with 1 Set(2) Frame Sliders 1 Set(2) Swing Arm Spool Sliders*
Pro-tek frame sliders are made from an acetal resin for strength and durability
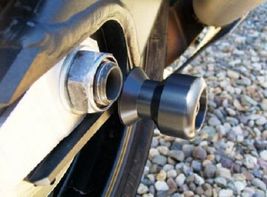
Helps protect your frame from nasty spills and tip overs.
No Sides Require modifications of fairing.
Comes complete with instructions for easy installation.
Comes with all mounting hardware.
Frame sliders are not designed to protect the plastics, rearsets (footpegs), or clipons (handlebars). They are designed to absorb the impact and energy of a fall so that you don't damage your engine or frame. Those two parts of the bike are critical components for racers and an insurance company as they will often total your bike if those are damaged.
Frame sliders come in two basic models which are cut or no cut frame sliders. A cut frame slider means that you have to cut your plastics to be able to bolt that type of frame slider on to your bike. No cuts obviously mean you do not have to cut a hole in your plastics. We like each model to have to cut a 2" hole in your plastics and other kits with no modifications you do not have to cut anything. The no cut kit normally has brackets that you mount up below your plastics that then go to a place where there are no plastics then you bolt on the slider to that plate. Basically the plate lets you relocate where the slider will bolt on. No cut sliders are also more expensive.
Now for quick bullet points about sliders:
1. They are not designed to protect plastics, clipons, or rearsets, even though they might help sometimes.
2. You do not want a slider to stick out too far or it will help flip your bike in a crash by snagging on the ground, curb or anything else.
3. You want delrin or plastic to touch down when you crash as they will grind off and not catch on anything and if hit hard enough or direct enough they will shatter.
4. If your slider shatters, grinds off or bends then it did it's job. You don't want it solid after a crash or it didn't absorb any energy but merely transfered it on to what you bolted it to.
5. When f1 cars hit the side of a track they explode as they don't want the drive to absorb the energy. Frame sliders are the same way. You want them to stay attached but get beat up and take the energy.
6. If the bolt on a frame slider bends that's a good thing as the only other option is to put the energy on the frame or mounting point. Better the bolt bends. Also if it didn't bend it might have flip the bike by snagging something. A mangled frame slider, but still on the bike, did it's job.
7. No cut frame sliders aren't a direct bolt on like cut sliders as they often have a bracket.
We hope this information was helpful and if you have anything to add or questions then feel free to contact us. Ride safe and hope you never have to use your frame sliders.
Kawasaki
'09-'11 Ninja 650R EX650R
'09-'11 Kawasaki Ninja 650R EX650 ACETAL FRAME SLIDERS
Remove the right faring. You will see the 10mm motor mount bolt,
just above that you will see an 8mm bolt in line with the bracket for
the faring. Now take our 8x80mm bolt with the short spacer.
(1.270 LONG) Slide the bolt through the bracket with the R facing
the inside along with the short spacer. Just start the bolt,
(Make sure you use blue loc-tite or your bracket will fall off).
As you tighten the bolt make sure the angle on the bracket matches
up with the frame tube. When the bolt is tight the bracket should
be against the frame tube. Put the right faring back on. Now mount
the short slider body on the bracket. Just snug the screw so the set
screw on the slider is mounted SO THE SET SCREW IS in the 6 o'clock
position. Now put the tip on and make sure it is ere you want it.
Then unscrew the tip and tighten the bolt to the bracket. Use a
allen wrench to tighten the set screw so the tip doesn't fall off.
After your first ride double check all your hardware to make sure it
is still tight. Remove the left faring. Remove the 8mm and the 6mm bolt
from the bike. If you hold the bracket up to where the 6mm bolt goes
into the center of the bracket, you will see how the bolts line up.
Use the Long spacer and the 8m bolt(make sure you use blue loc-tite or
your bracket will fall off) install the 8mm bolt hand tight. Now use
the 6mm bolt and install through the bracket, then tighten the bolts.
Put the Left faring back on. Now count the long slider body on the bracket.
Just snug the screw so the set screw on the slider is mounted in the
6 o'clock position. Now put the tip on and make sure it is where you want
it. Then unscrew the tip and tighten the bolt to the bracket. Use
the allen wrench to tighten the set screw so the tip doesn't fall off.
After your first ride double check all your hardware to make sure it is tight.
NOTE: when you install the tips screw the tips on by hand tighten them
all the way down. When you tighten the set screw with a allen wrench
supplied. Make sure that you can not unscrew the tips by your hand.
If you can the set screw is not tight enough.
Item list Quantity:
Left bracket 1 each, Right bracket 1 each
8mm x 80mm bolt 2 each 1 FOR EACH SIDE
Long spacer 1 each IS FOR LEFT SIDE 1.960 LONG
Short spacer 1 each IS FOR RIGHT SIDE 1.270 LONG
6MM X 20MM BOLT IS FOR LEFT SIDE
Track Page Views With
Auctiva's FREE Counter
Added to your wish list!
- Protek Frame Slider Swing Arm Spool Kit Kawasaki 2009 2010 2011 EX650R Ninja 650
- 1 in stock
- Handling time 1 day.
- Returns/refunds accepted
Get an item reminder
We'll email you a link to your item now and follow up with a single reminder (if you'd like one). That's it! No spam, no hassle.
Already have an account?
Log in and add this item to your wish list.